Connect Windows to MU Secure Wi-Fi
Use MU Secure to connect Windows devices to campus Wi-Fi.
1. Click or tap the Network icon on the lower right of the Windows bottom task bar.

2.The Control Center appears. Select the arrow next to Wi-Fi.

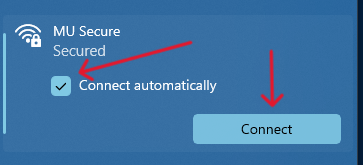
3. A panel appears showing Wi-Fi networks. Click or tap MU Secure. If not already checked, select the "Connect automatically" checkbox. Then click or tap Connect.

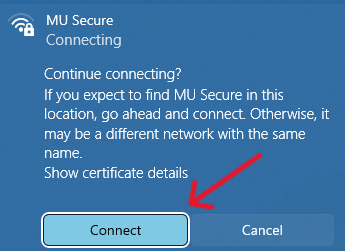
4. If you see a prompt asking "Continue Connecting?" click or tap Connect.

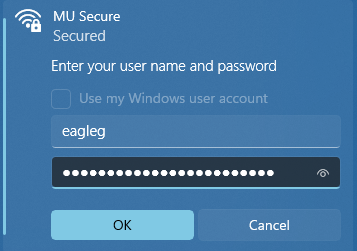
5. If prompted to login...
-
Students or faculty/staff with personally owned computers: Enter your Marquette username — not your email address — and password. Click or tap OK.
Faculty/staff with university-owned computers: Select the checkbox for "Use my Windows user account." Click or tap OK.

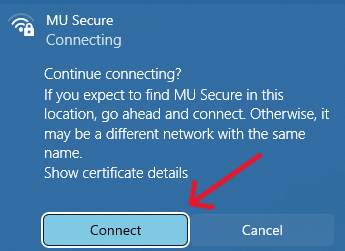
6. If you see a prompt asking "Continue Connecting?" click or tap Connect.

7. If your login is successful, Windows shows you're connected to MU Secure Wi-Fi.

Tip: If you're having intermittent Wi-Fi issues, remove MU Secure from your Windows device and then add it again. In Windows, open the Start menu. Go to Settings > Network & internet > Wi-Fi > Manage known networks. In Windows 10, select MU Secure and then click or tap Forget. For Windows 11, click or tap the Forget option for MU Secure. Then follow the steps above to re-add MU Secure Wi-Fi.